
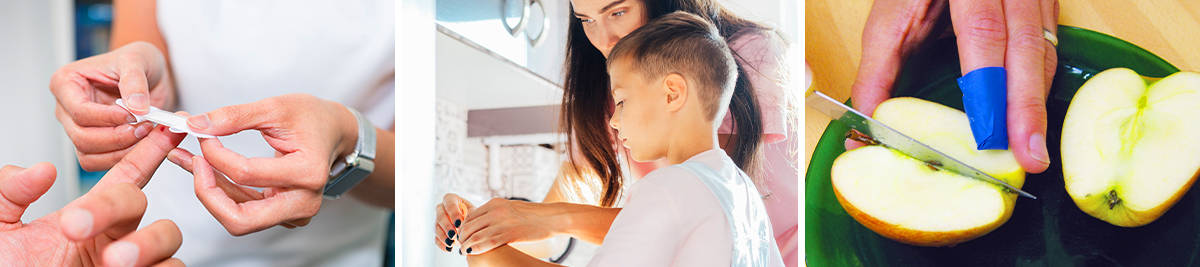
Your fingertip can be a difficult and awkward body part to properly bandage. Plasters and bandages applied to the finger can easily slip off or limit range of motion. Finger plasters are in the shape of an hourglass and conform to the shape of your finger for a more secure fit.
How to properly apply a finger plaster
 Step 1: Clean your finger with cool water then gently dry it.
Bandaging a wound will only be beneficial if the wound’s healing environment is kept as clean as possible. Simply run your finger under cool running water before gently drying it with a clean towel or cotton gauze pad. Gently apply pressure to stop any bleeding.
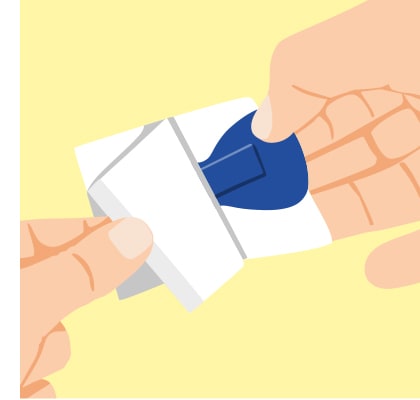
Step 2: Remove your finger plaster from its packaging.
Carefully remove your finger plaster from its sterile packaging and peel away one side of the paper covering the adhesive.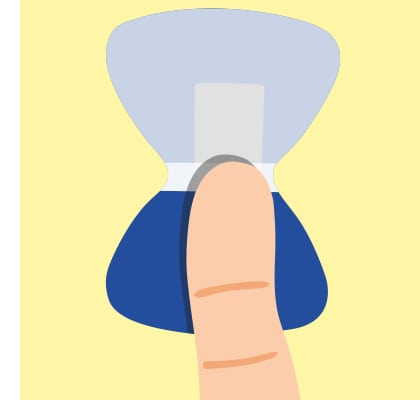 Step 3: Place your finger in the centre of the plaster.
Before removing the other strip of paper covering the plaster’s adhesive, place your finger in the centre of the plaster’s gauze area. Make sure you leave enough space for the gauze to cover the wound after you fold the bandage.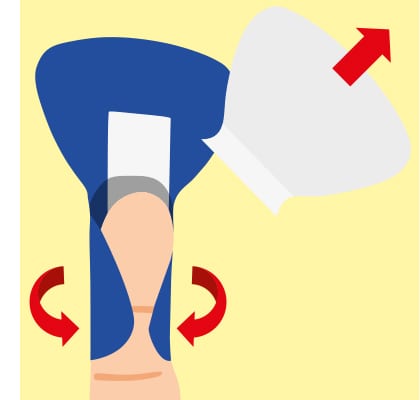 Step 4: Place your finger in the centre of the plaster.
Bring the bottom corner of the plaster around and over your fingertip and press it down so it sticks. Once the plaster is secured on one side, you’re free to remove the paper covering from the other side and wrap it around your finger as well.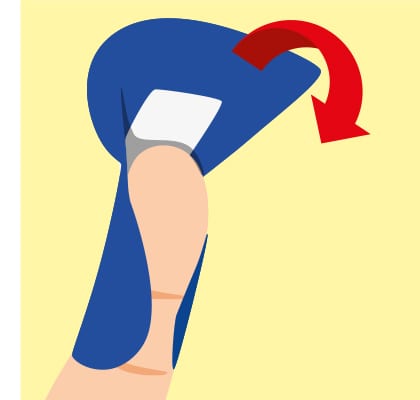 Step 5: Fold the top of the plaster over your fingertip.
Once the bottom half of the plaster is secure, take the top half and fold it over the tip of your finger so that the gauze pad completely covers the wound. The unfolded corners of the plaster should be sticking out like wings.
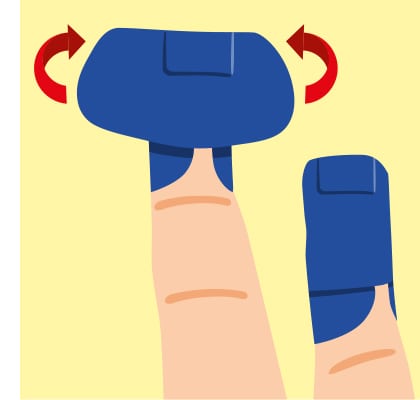 Step 6: Secure the unfolded corners onto your fingertip.
Take the loose adhesive corners and wrap them around, pressing them in place so the plaster is secured around your fingertip.
Should you cover a wound on a finger?
Contrary to folk wisdom you may have heard, wounds need a moist environment – not air – to heal effectively. If you don’t cover a wound, the healing process will be considerably slower. You should always apply a plaster to minor wounds because:
- Covering a wound with a clean dressing maintains a moist healing environment that keeps cells alive.
- Exposure to open air dries wounds and promotes cell death, not healing.
- An exposed wound runs the risk of picking up dirt and debris if left uncovered.
- Wounds that heal in a moist environment have less visible scarring.
- Uncovered wounds are usually more painful.
How often should you change a finger dressing?
Plasters should be changed daily, and any time they get dirty or wet, or if blood soaks through.Read our other blogs for more information on first aid or contact us for further advice and information on our products.
About the author:
Jo Stokes is a writer, marketer and trained first aider at First Aid Online.
Find out more about Jo.
By Jo Stokes